Deploying Your Model Using HuggingFace and Gradio

!UPDATE: i'm now publishing here
Step 1: Train your model
To setup your local computer to train the model, refer to my previous blog post. Otherwise, check out my Google Colab notebook which you can copy and use to train your own model. Mine is a debugged and updated version from Fast.ai's course anyways. I have some comments in the code that document my journey.
Step 2: Setting up HuggingFace Space with Gradio
Fast.ai's lesson 2, as discussed by Jeremy here, touches on model sharing. Here are additional steps to link your local setup with HuggingFace for seamless Git operations:
Locate your PUBLIC key on Mac via Finder:
Go > Go to Folder > ~/.ssh.- Do NOT share your private key.
Open the
.pubfile with TextEdit or Terminal usingcat ~/.ssh/id_rsa.pub.Add your public key here on HuggingFace.
Test the connection:
ssh -T git@hf.co.Add HuggingFace's public key to your system for easier authentication. Instructions here.
Step 3: Create web app
Now it’s time to use your trained model in a deployed web app. You can see all my code here—just click on “Files” in the top right:
Starting here in the video, Jeremy walks through using a Jupyter notebook to generate an app.py. Here’s his HuggingFace Spaces using his Dog v. Cat model. If you’re curious, I figured out that the URLs.PETS is a link to a standard image library of dogs and cats that this call references:
Steps:
Install
gradioin your conda environment.You'll need
git LFSfor handling large.pklfiles sobrew install git-lfs.Make sure git tracks the .pkl file:
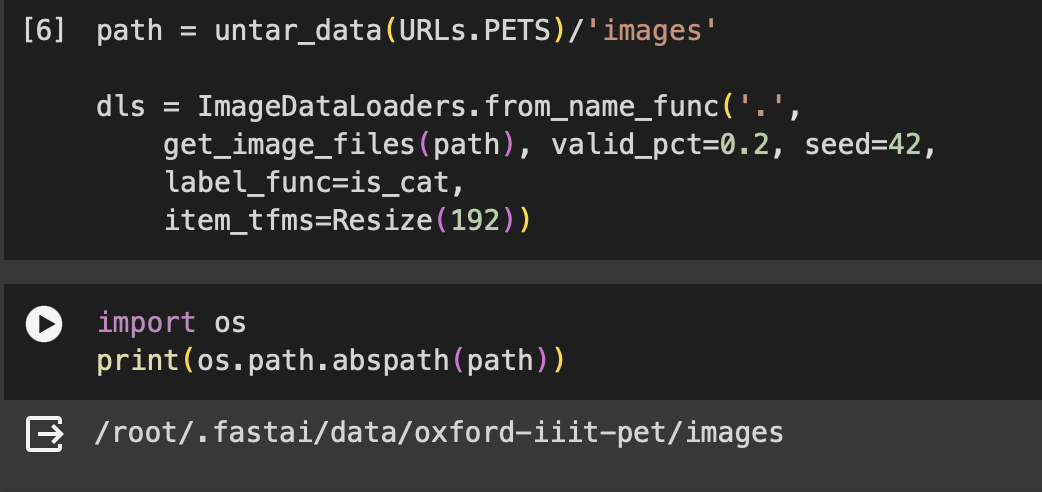
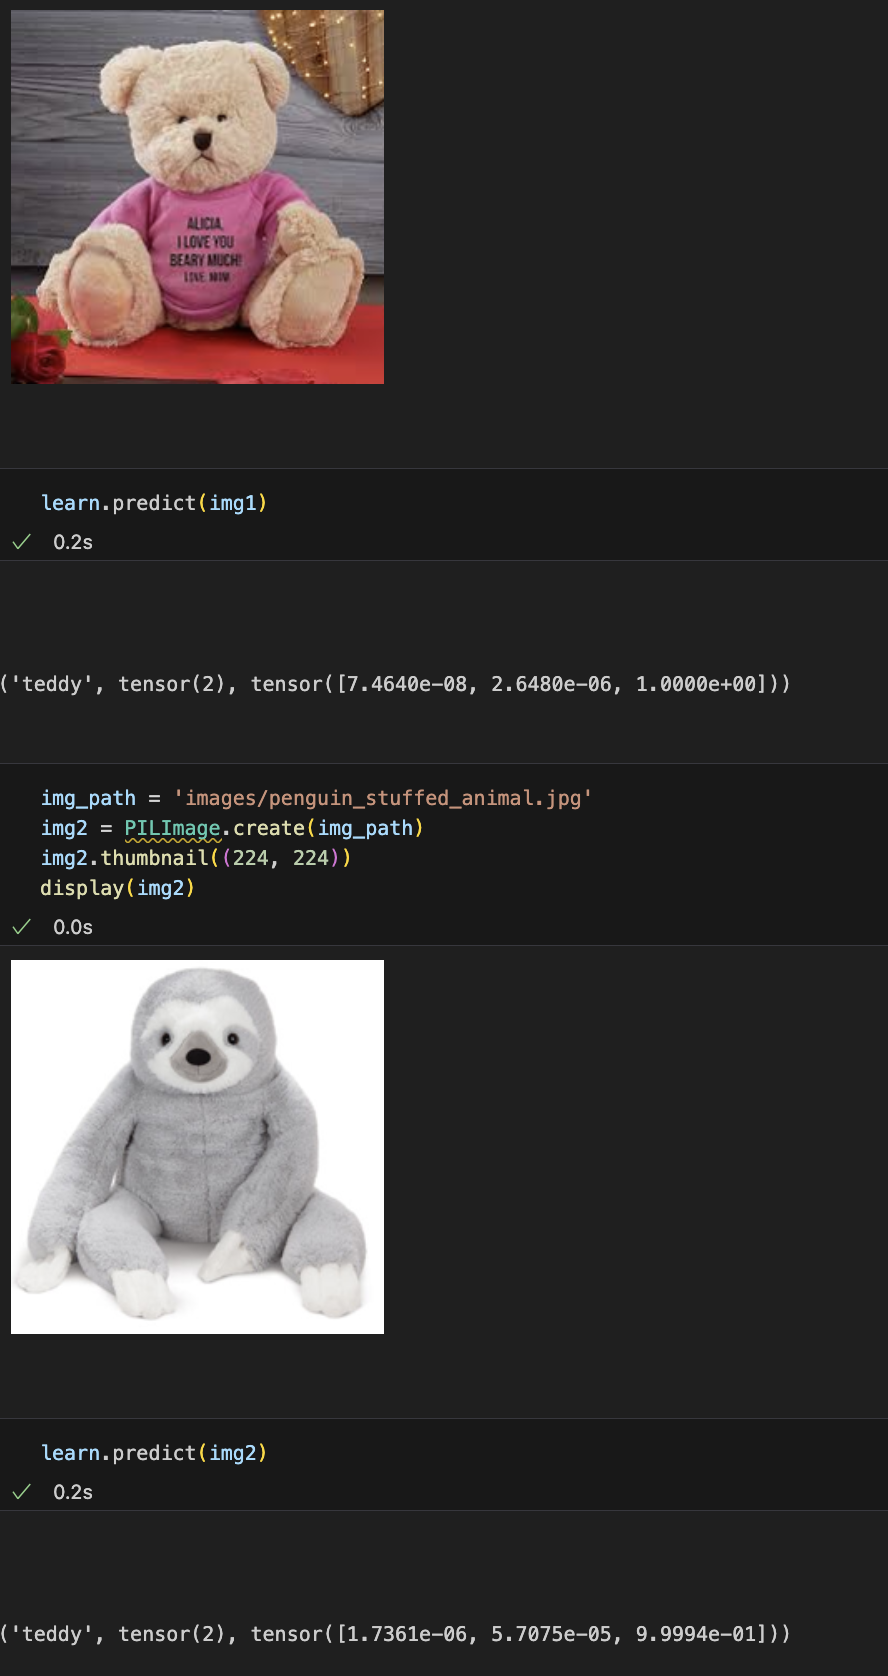
git lfs track "*.pkl"Verify your code model import with incremental tests. Put some new images into your project folder and run them in Jupyter. Here's a screenshot of my noteook--looking good:
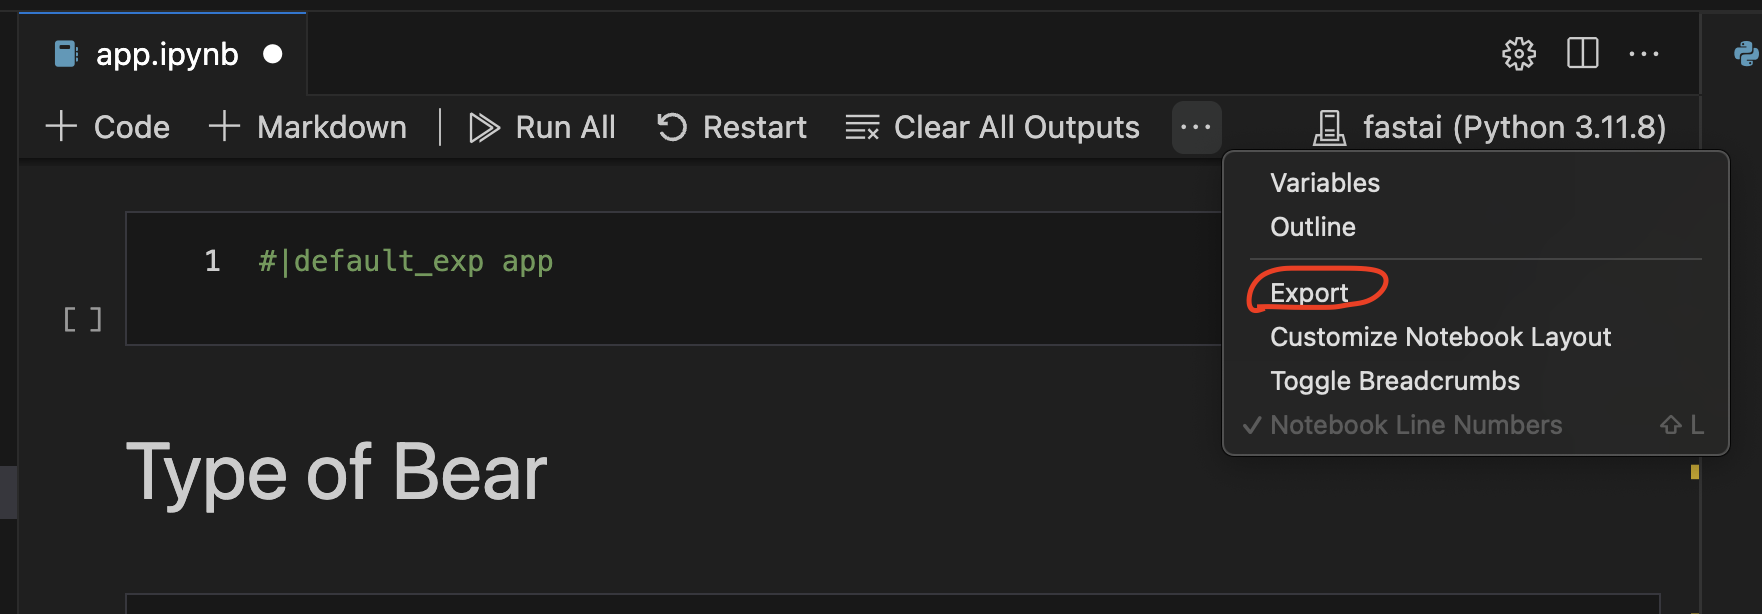
For notebook-to-script conversion, manual conversion is a viable workaround since the file is short. nbdev has been updated since the course, and I didn't want to read more documentation. I'm using VS Code and the Jupyter extension supports an export function that help, but I found it easier to just copy and paste the export labeled blocks. You can find the export function here:
Ensure the category order in your
app.pymirrorsdls.vocabfrom your learner model to avoid mislabeling. My deployed app kept labeling grizzlies as black bears and black bears as grizzlies. But I tested as I went so I knew my model was ok. Here's my dls.vocab in my notebook where I trained my model: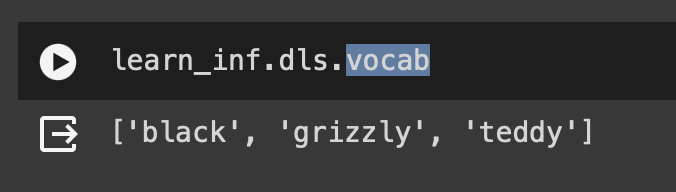
And here's the matching sequence in my Gradio app.py:
  # And here's my Gradio app.py

  #|export
  categories = ('black', 'grizzly', 'teddy')

  def classify_image(img):
      pred, idx, probs = learn.predict(img)
      if max(probs).item() < 60:
          return "Likely not one of these bears."
      else:
          return dict(zip(categories, map(float, probs)))
Step 4: Make a website
Of course you can also go the last little bit, and create a GitHub page with a little JS calling the your HF space via its API--ah, the callbacks and promises. how I haven't missed you. I just chose not to because I got what I wanted out of this lesson at this point.


